In this weekly release (PSWriteWord 0.4.6) there are handful of updates and tweaks to Add-WordTable and Add-WordText. If you've not yet seen them in action I encourage you to try them out as those are really powerful functions. While you can build Tables or Write texts in a standard .NET way it's much easier to use those provided by this module.
Please notice this article contains parts of information (still useful) and may not reflect all functionalities of this module. For download, source code and so on you should refer to the dedicated PSWriteWord module page. After reading this one… of course! It contains useful information, examples and know-how.
Essentially both Add-WordTable and Add-WordText are built upon same principal that you can feed formatting into it as part of collection of objects. If you want text in headers to be bold you simply add -Bold $true. If you have multiple texts (one by one) or in case of tables multiple rows you can feed -Bold $true, $false, $false, $false which for Add-WordTable would mean you would get Header in Bold and next 3 rows in normal way. If the table would have 5 rows the remaining 2 would not be formatted at all. Same thing would happen for Add-WordText. That's how Continue Formatting was born. For now it's only available for Add-WordTable but it will make it's way to Add-WordText soon enough. In case of Add-WordTable ContinueFormatting switch picks up last set value and continues with it for remaining rows. So if you want whole table to be in FontFamily/Name Arial you would just have to do -FontFamily Arial -ContinueFormatting. There are far more examples like this one below. It sets Arial for the whole table, headers get fontsize of 10 and rest of table is in font size of 8.
Add-WordTable -Table $Table -FontFamily Arial -FontSize 10,8 -ContinueFormatting
In next example notice how I've added $false for Bold. If I wouldn't do it –ContinueFormatting would pick up formatting from Header and continue with it. Also notice each Formatting is done separately so it's possible to have more settings for Bold then there is for Italics.
Add-WordTable -Table $Table -FontFamily Arial -FontSize 10,8 -Bold $true, $false -Italic $false,$true -ContinueFormatting
💡 How can I use it?
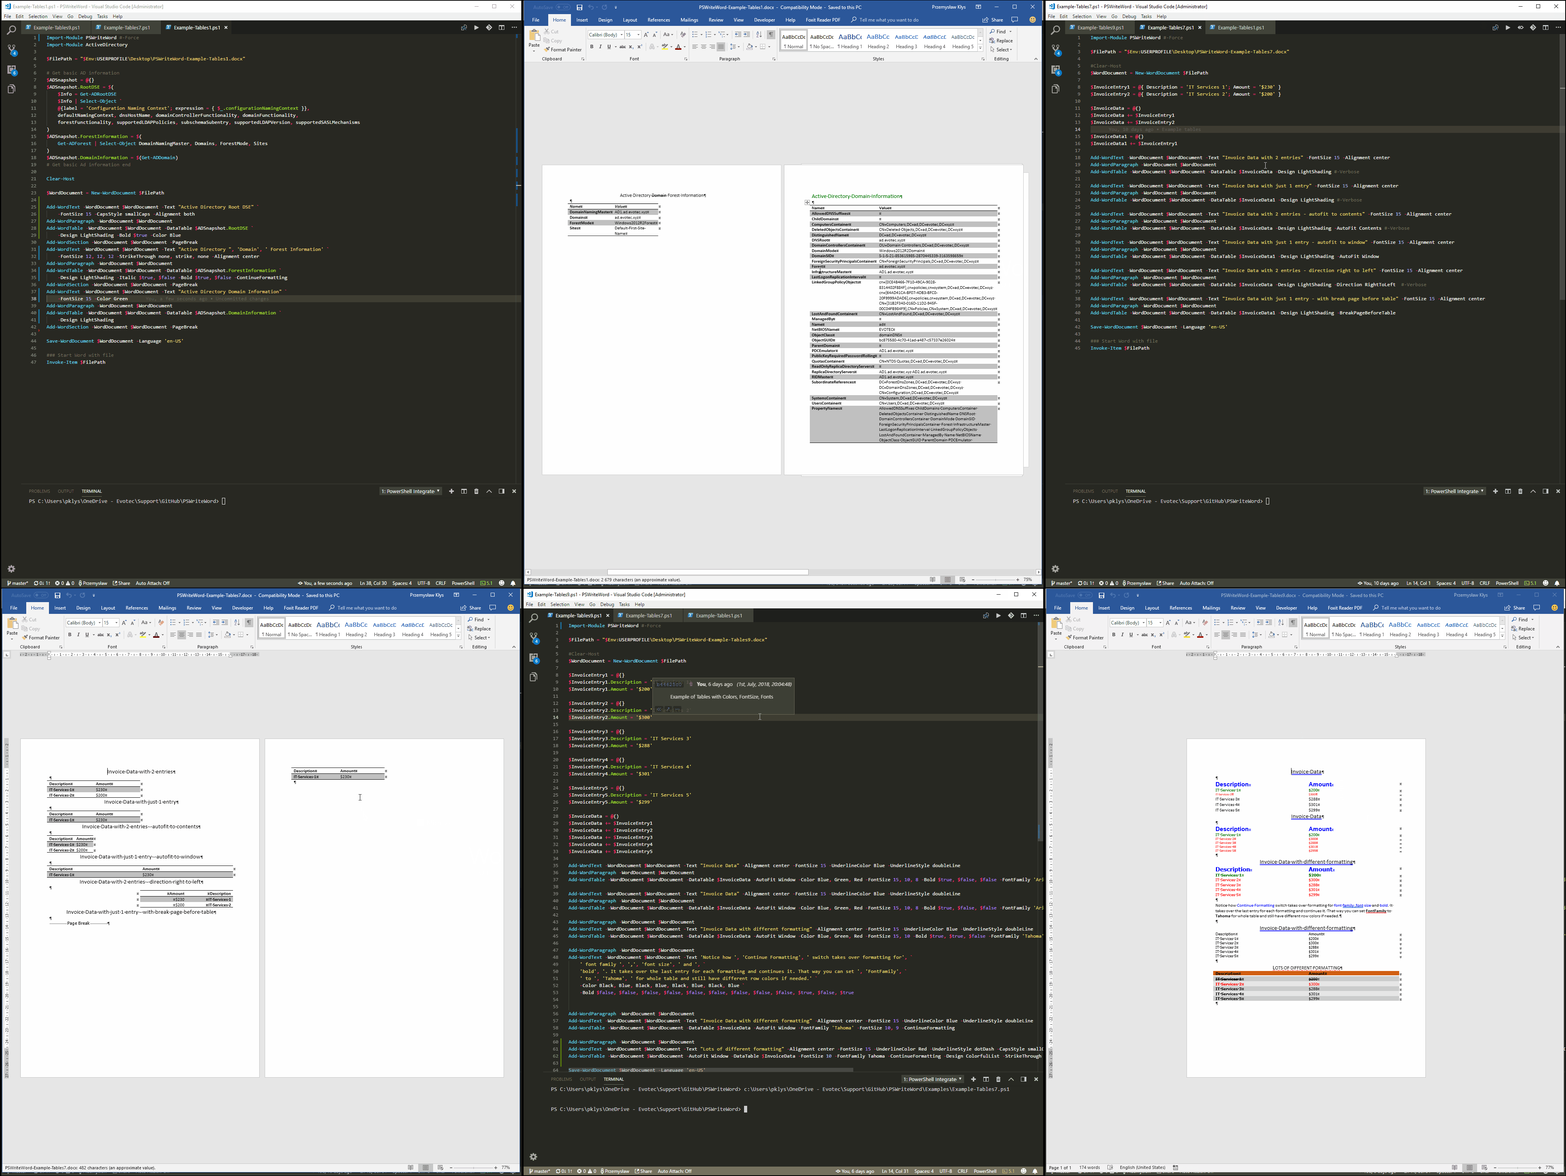
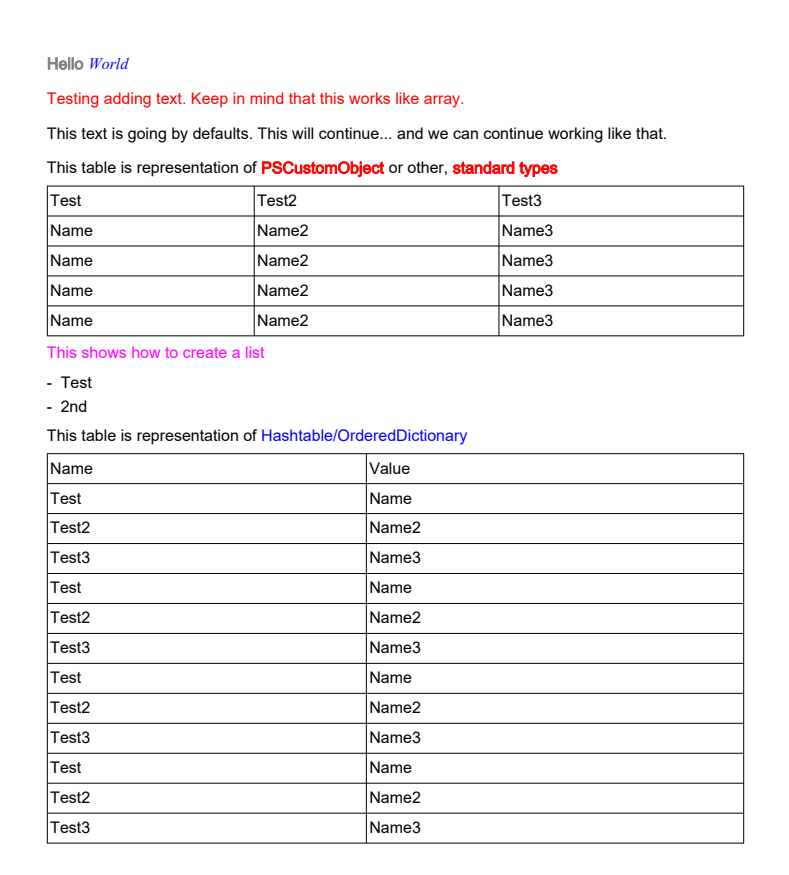
Below you can see 3 examples. They show how to build tables or texts without much effort on your side. You can fully customize Table Headers, Table Rows, change fonts, add strike-through, add highlights, add colors…
Below you can find code from one of the examples.
Import-Module PSWriteWord #-Force

$FilePath = "$Env:USERPROFILE\Desktop\PSWriteWord-Example-Tables9.docx"

#Clear-Host
$WordDocument = New-WordDocument $FilePath

$InvoiceEntry1 = @{}
$InvoiceEntry1.Description = 'IT Services 1'
$InvoiceEntry1.Amount = '$200'

$InvoiceEntry2 = @{}
$InvoiceEntry2.Description = 'IT Services 2'
$InvoiceEntry2.Amount = '$300'

$InvoiceEntry3 = @{}
$InvoiceEntry3.Description = 'IT Services 3'
$InvoiceEntry3.Amount = '$288'

$InvoiceEntry4 = @{}
$InvoiceEntry4.Description = 'IT Services 4'
$InvoiceEntry4.Amount = '$301'

$InvoiceEntry5 = @{}
$InvoiceEntry5.Description = 'IT Services 5'
$InvoiceEntry5.Amount = '$299'

$InvoiceData = @()
$InvoiceData += $InvoiceEntry1
$InvoiceData += $InvoiceEntry2
$InvoiceData += $InvoiceEntry3
$InvoiceData += $InvoiceEntry4
$InvoiceData += $InvoiceEntry5

Add-WordText -WordDocument $WordDocument -Text "Invoice Data" -Alignment center -FontSize 15 -UnderlineColor Blue -UnderlineStyle doubleLine
Add-WordParagraph -WordDocument $WordDocument
Add-WordTable -WordDocument $WordDocument -DataTable $InvoiceData -AutoFit Window -Color Blue, Green, Red -FontSize 15, 10, 8 -Bold $true, $false, $false -FontFamily 'Arial', 'Tahoma'

Add-WordText -WordDocument $WordDocument -Text "Invoice Data" -Alignment center -FontSize 15 -UnderlineColor Blue -UnderlineStyle doubleLine
Add-WordParagraph -WordDocument $WordDocument
Add-WordTable -WordDocument $WordDocument -DataTable $InvoiceData -AutoFit Window -Color Blue, Green, Red -FontSize 15, 10, 8 -Bold $true, $false, $false -FontFamily 'Arial', 'Tahoma' -ContinueFormatting

Add-WordParagraph -WordDocument $WordDocument
Add-WordText -WordDocument $WordDocument -Text "Invoice Data with different formatting" -Alignment center -FontSize 15 -UnderlineColor Blue -UnderlineStyle doubleLine
Add-WordTable -WordDocument $WordDocument -DataTable $InvoiceData -AutoFit Window -Color Blue, Green, Red -FontSize 15, 10 -Bold $true, $true, $false -FontFamily 'Tahoma' -ContinueFormatting

Add-WordParagraph -WordDocument $WordDocument
Add-WordText -WordDocument $WordDocument -Text 'Notice how ', 'Continue Formatting', ' switch takes over formatting for', `
    ' font family ', ',', 'font size', ' and ', `
    'bold', '. It takes over the last entry for each formatting and continues it. That way you can set ', 'FontFamily', `
    ' to ', 'Tahoma', ' for whole table and still have different row colors if needed.' `
    -Color Black, Blue, Black, Blue, Black, Blue, Black, Blue `
    -Bold $false, $false, $false, $false, $false, $false, $false, $false, $false, $true, $false, $true


Add-WordParagraph -WordDocument $WordDocument
Add-WordText -WordDocument $WordDocument -Text "Invoice Data with different formatting" -Alignment center -FontSize 15 -UnderlineColor Blue -UnderlineStyle doubleLine
Add-WordTable -WordDocument $WordDocument -DataTable $InvoiceData -AutoFit Window -FontFamily 'Tahoma' -FontSize 10, 9 -ContinueFormatting

Add-WordParagraph -WordDocument $WordDocument
Add-WordText -WordDocument $WordDocument -Text "Lots of different formatting" -Alignment center -FontSize 15 -UnderlineColor Red -UnderlineStyle dotDash -CapsStyle smallCaps
Add-WordTable -WordDocument $WordDocument -AutoFit Window -DataTable $InvoiceData -FontSize 10 -FontFamily Tahoma -ContinueFormatting -Design ColorfulList -StrikeThrough none, doubleStrike, none -Color Black, Black, Red, Black

Save-WordDocument $WordDocument -Language 'en-US'

### Start Word with file
Invoke-Item $FilePath
Please notice this article contains parts of information (still useful) and may not reflect all functionalities of this module. For download, source code and so on you should refer to the dedicated PSWriteWord module page. After reading this one… of course! It contains useful information, examples and know-how.
Rest of examples are available next to source code on GitHub. There are more then 20 examples that are updated from time to time so explore and enjoy!

