Dashimo ultimate goal is to be as easy to use as possible. With the introduction of it a few days ago I made a promise to myself that I want to keep it as simple to use as possible. If you don't know what Dashimo is, have a read here – Meet Dashimo. When I posted it on Reddit few people had some ideas and feature request that would make it a bit nicer, and when I heard about I agreed. So today, after a couple of days I have a few updates. I also noticed that my examples might have been too hard to use and understand for beginners and people not having a lot of touch with Active Directory. This time all code you can find below will use Get-Process as a way to show you that you can use any output that comes as a Table.
💡 Dashimo – Default Sorting
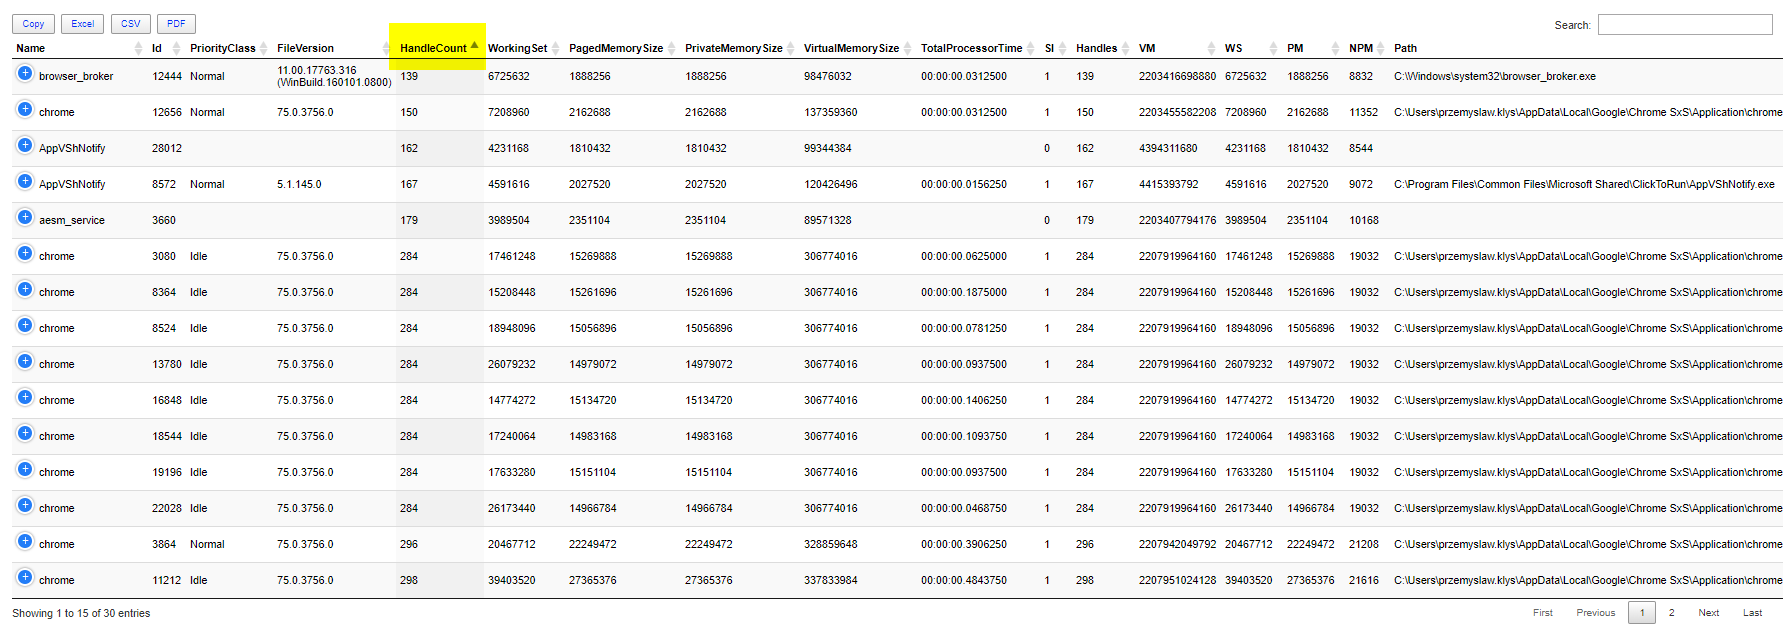
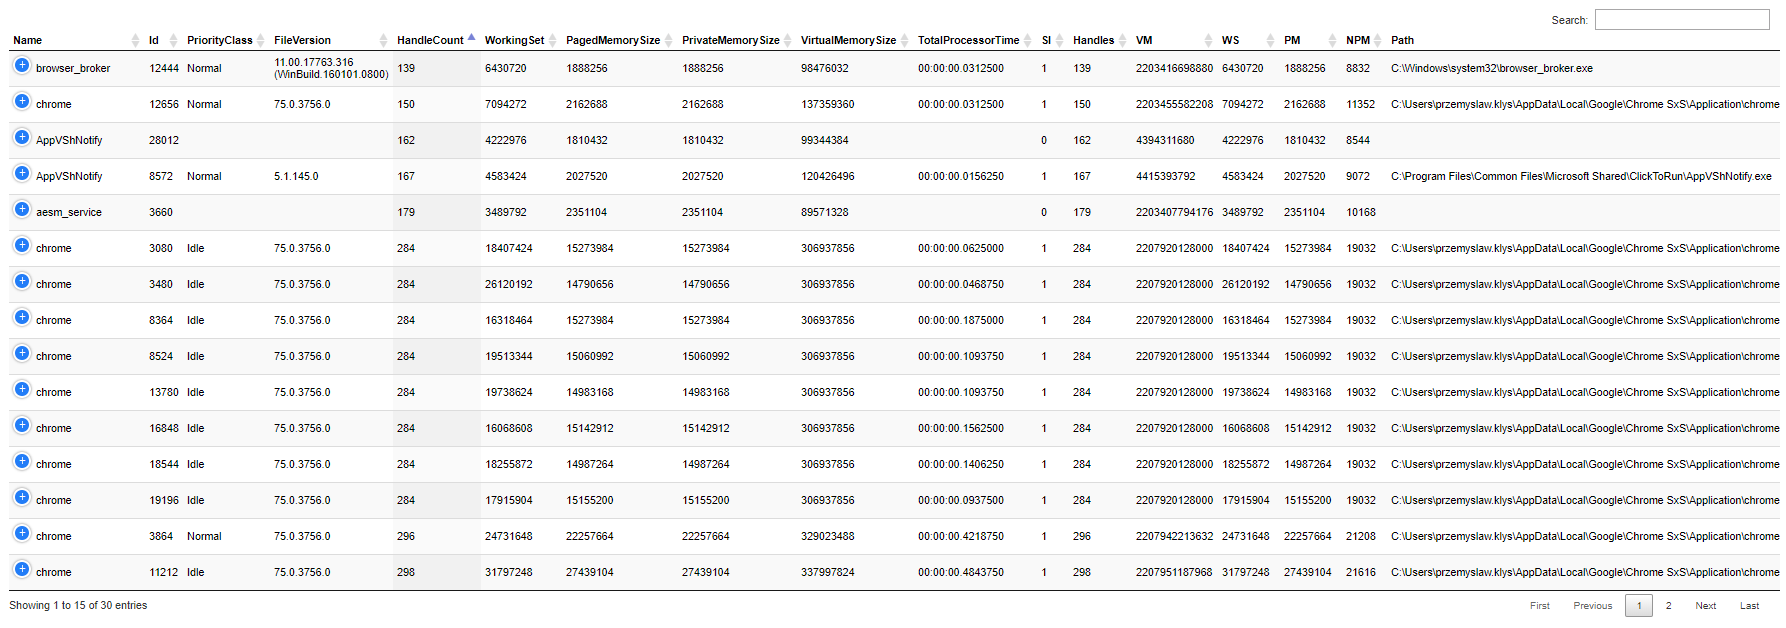
When you use Dashimo it doesn't do any sorting by default. What you pass to it, you should see it in the same way in Dashimo. I've now added two options to Table function that allow you to pre-sort data so that when you open HTML it's sorted as you want it.
$Process = Get-Process | Select-Object -First 30

Dashboard -Name 'Dashimo Test' -FilePath $PSScriptRoot\DashboardSimplestTable.html -Show {
    Table -DataTable $Process -DefaultSortIndex 4 -HideFooter
}
As you can notice above there is DefaultSortIndex parameter which allows you to sort based on column index.
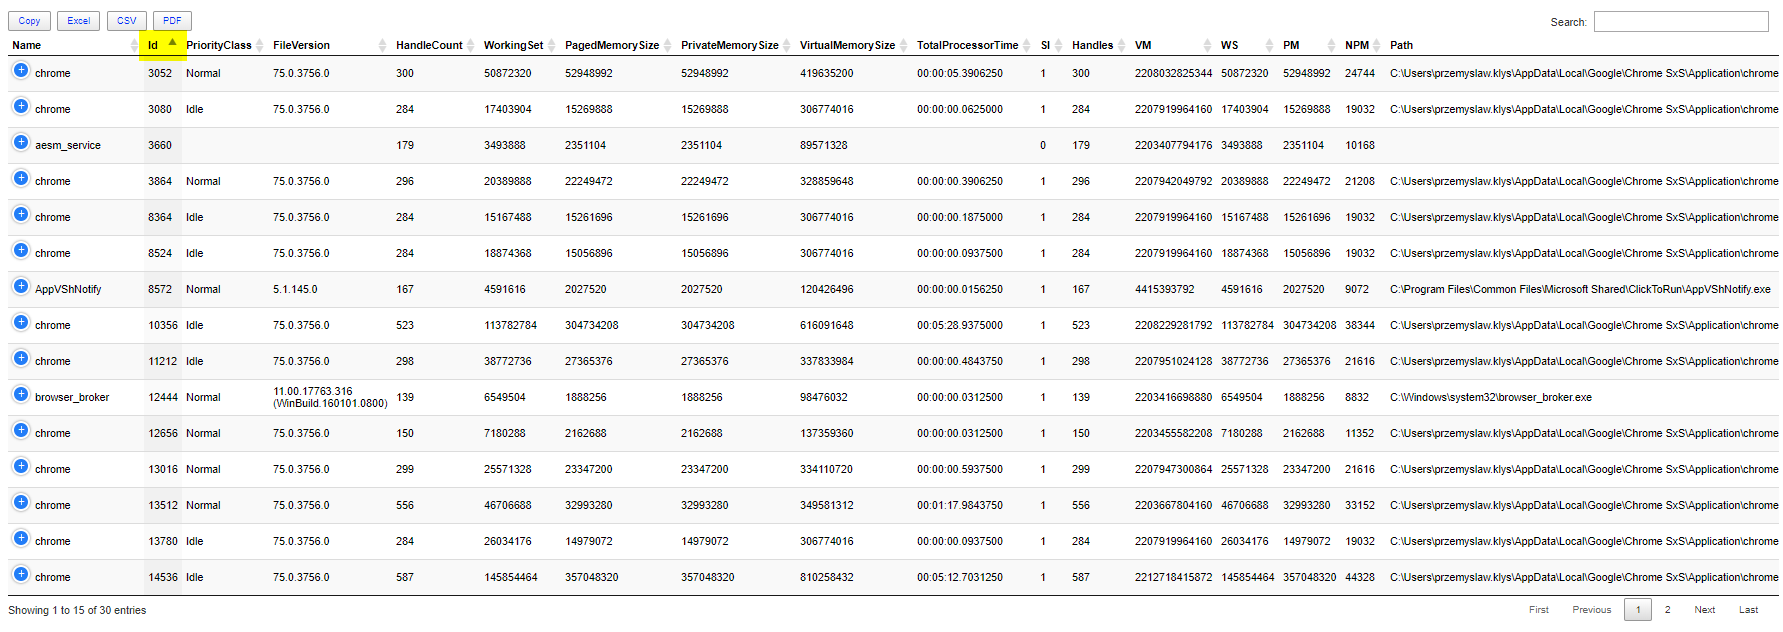
You should also notice I'm using Show parameter for Dashboard function which basically opens up HTML in a browser after generation of HTML is done. Here's the same example but instead of using a column index, I'm using column name.
$Process = Get-Process | Select-Object -First 30

Dashboard -Name 'Dashimo Test' -FilePath $PSScriptRoot\DashboardSimplestTable.html -Show {
    Table -DataTable $Process -DefaultSortColumn 'Id' -HideFooter
}
💡 Dashimo – Search / Find
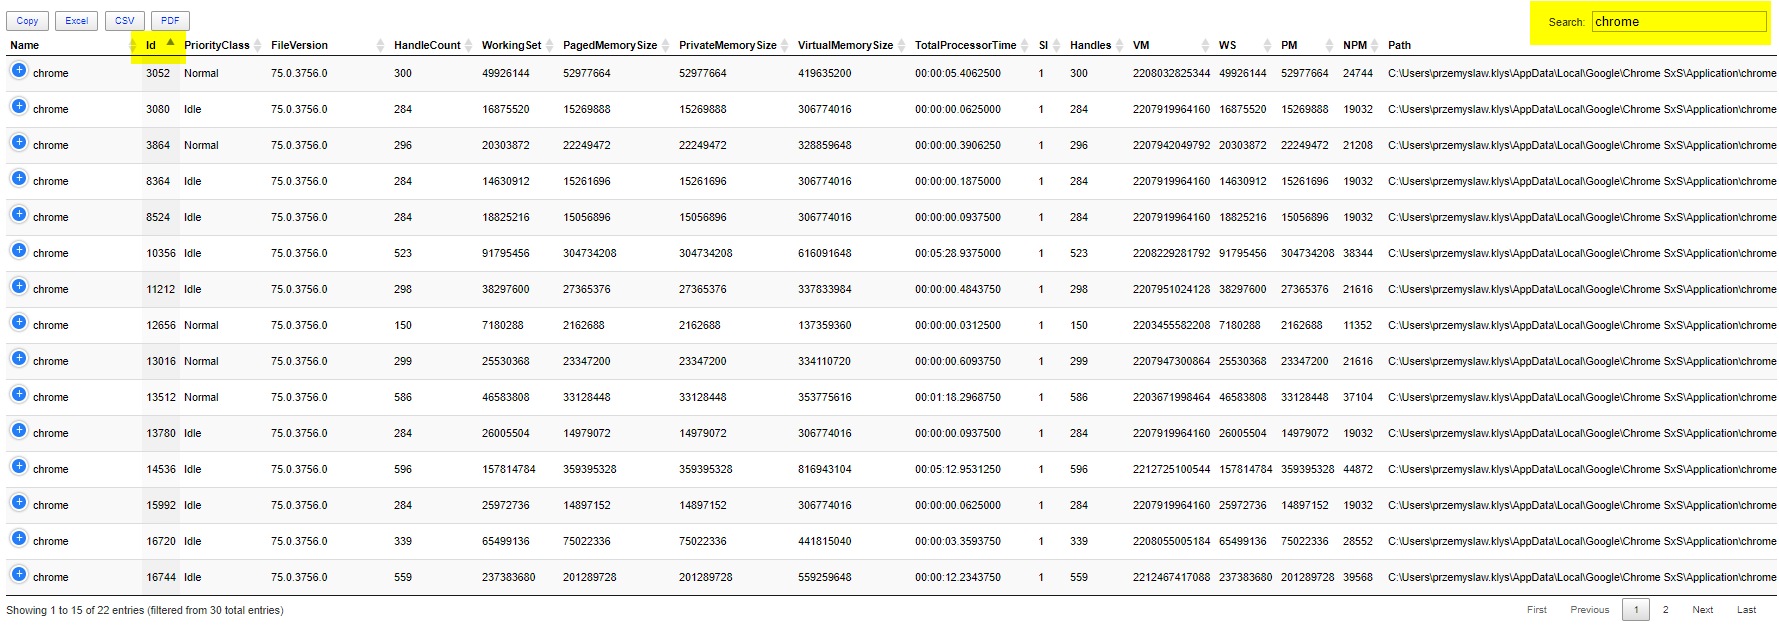
You know, by default Dashimo adds Search box in the top right corner. This feature allows a user using Dashimo to find in a table what he wants quickly. But sometimes you may want to do that for a user already. You know, when you send the report to your Manager, and he wanted only to see Chrome processes you could do something like this code below.
$Process = Get-Process | Select-Object -First 30

Dashboard -Name 'Dashimo Test' -FilePath $PSScriptRoot\DashboardSimplestTable.html -Show {
    Table -DataTable $Process -DefaultSortColumn 'Id' -HideFooter -Find 'chrome'
}
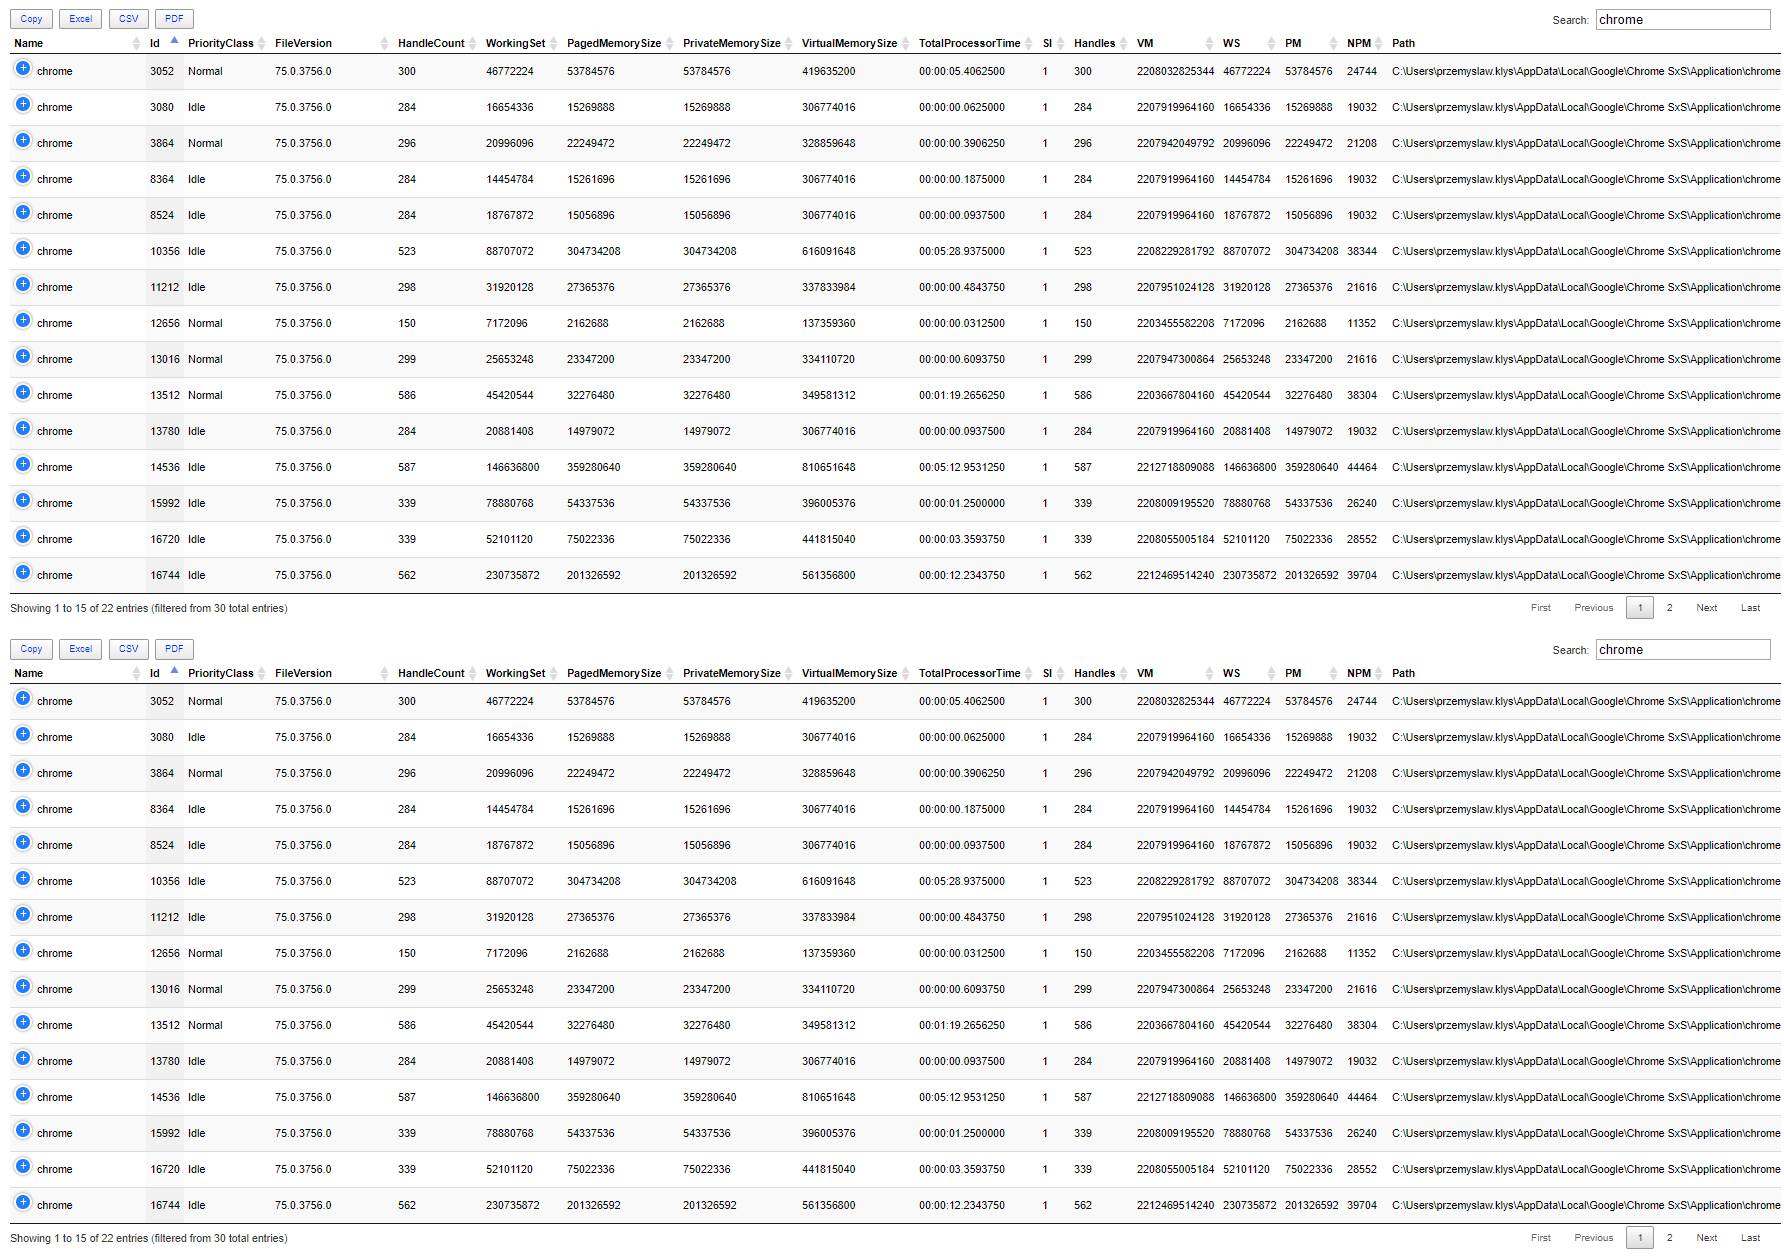
Parameter added is called Find, and it's available for Table. A user still will be able to remove that text and search for something else, but it's there if you want it. I've left sorting in there as well. Please notice in all examples above I'm not using any Sections or Panels. I'm merely opening up Dashboard, and adding Table to it. You can go ahead and add multiple tables one after another. Of course panels and sections bring additional benefits, but if you want something quick, it's there if you need it.
$Process = Get-Process | Select-Object -First 30

Dashboard -Name 'Dashimo Test' -FilePath $PSScriptRoot\DashboardSimplestTable.html -Show {
    Table -DataTable $Process -DefaultSortColumn 'Id' -HideFooter -Find 'chrome'
    Table -DataTable $Process -DefaultSortColumn 'Id' -HideFooter -Find 'chrome'
}
💡 Dashimo – Conditional Formatting
When I first started thinking on Conditional Formatting, I thought it would be hard to make it easy. I do hope that implementation you see below will meet your expectations and give you a nice, easy way to use it. What is conditional formatting? Well, imagine you want to show values higher or lower than some value, and that you want to make it clear. That's what this feature is all about. But I've gone a bit further and allowed for coloring table as you want it with conditions.
I've taken the same code as before and added conditional formatting to it. I wanted to see text colored in BlueViolet if a value in the ID column is greater than 10000. I also wanted coloring to apply to the whole row, and not just value.
$Process = Get-Process | Select-Object -First 30

Dashboard -Name 'Dashimo Test' -FilePath $PSScriptRoot\DashboardSimplestTable.html -Show {
    Table -DataTable $Process -HideFooter {
        TableConditionalFormatting -Name 'ID' -ComparisonType number -Operator gt -Value 10000 -Color BlueViolet -Row
    }
}
What you see above is I've opened a bracket for Table, and inside a table, I've defined TableConditionalFormatting. I needed to define comparison a ComparisonType (number or string). Then we need to set the operator. I'm using a few standard Powershell operators to make it easy to remember. The list is limited to eq, lt, le, ge, gt. Now I've Value parameter which should be evident for you. Finally, we have two more settings. First one is Color. This is related to text coloring. The other one is called Row. This is a switch parameter. It tells conditional formatting that if Value of 10000 is found the whole row should be colored, a not just that particular value. If you do not use Row switch, it will only apply to Value. What is great about Conditional Formatting feature it doesn't just apply once. You actually can define multiple conditions and they DON'T HAVE TO BE RELATED. Let's see this on an example.
$Process = Get-Process | Select-Object -First 30

Dashboard -Name 'Dashimo Test' -FilePath $PSScriptRoot\DashboardSimplestTable.html -Show {
    Table -DataTable $Process -HideFooter {
        TableConditionalFormatting -Name 'ID' -ComparisonType number -Operator gt -Value 10000 -Color BlueViolet -Row
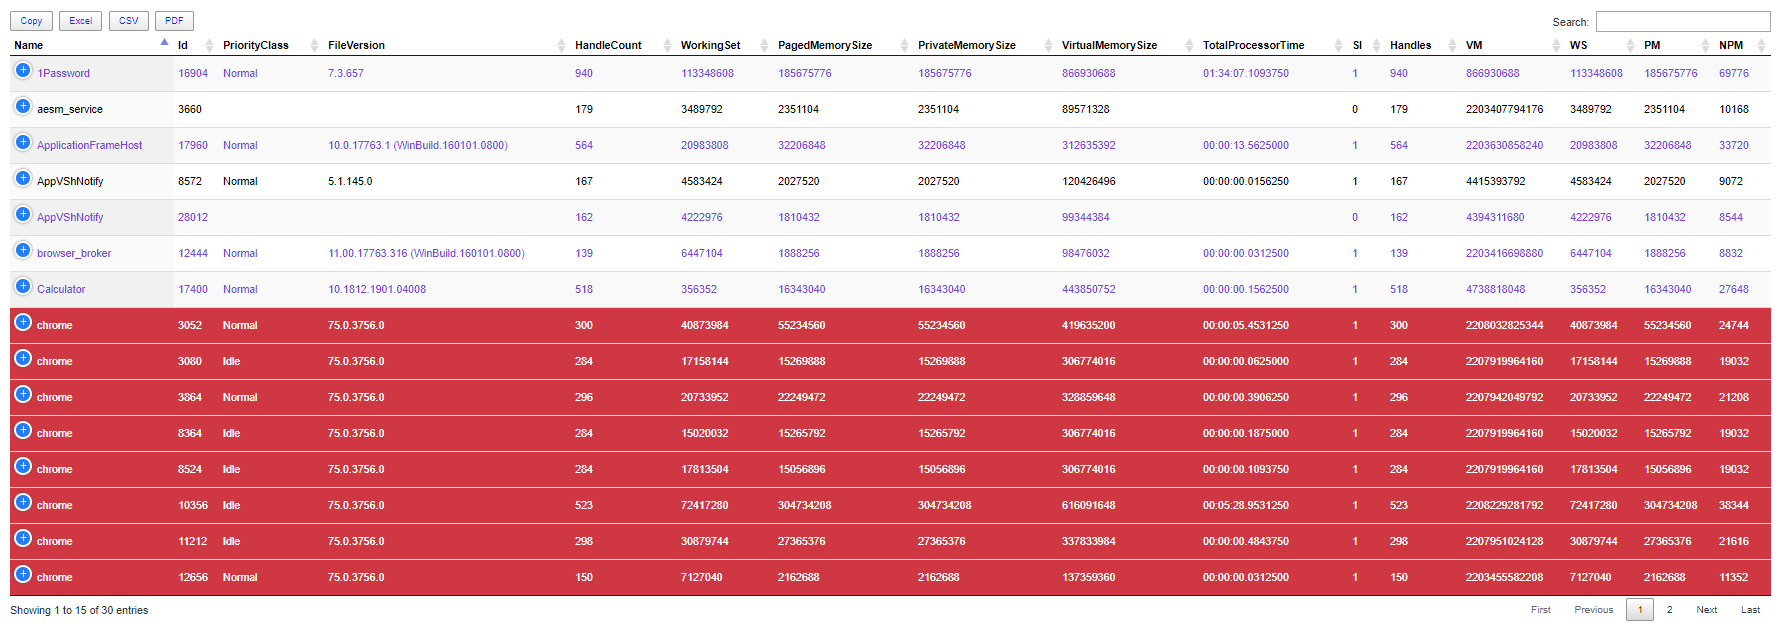
        TableConditionalFormatting -Name 'Name' -ComparisonType string -Operator eq -Value 'chrome' -Color White -BackgroundColor Crimson -Row
    }
}
Do you see what I did there? I've added another condition where I told Table I want to highlight every row that has chrome as process name. It's not at all related to the first condition. It also changed the background color and text color as well. But wait? I also want to highlight all processes that are Idle.
$Process = Get-Process | Select-Object -First 30

Dashboard -Name 'Dashimo Test' -FilePath $PSScriptRoot\DashboardSimplestTable.html -Show {
    Table -DataTable $Process -HideFooter {
        TableConditionalFormatting -Name 'ID' -ComparisonType number -Operator gt -Value 10000 -Color BlueViolet -Row
        TableConditionalFormatting -Name 'Name' -ComparisonType string -Operator eq -Value 'chrome' -Color White -BackgroundColor Crimson -Row
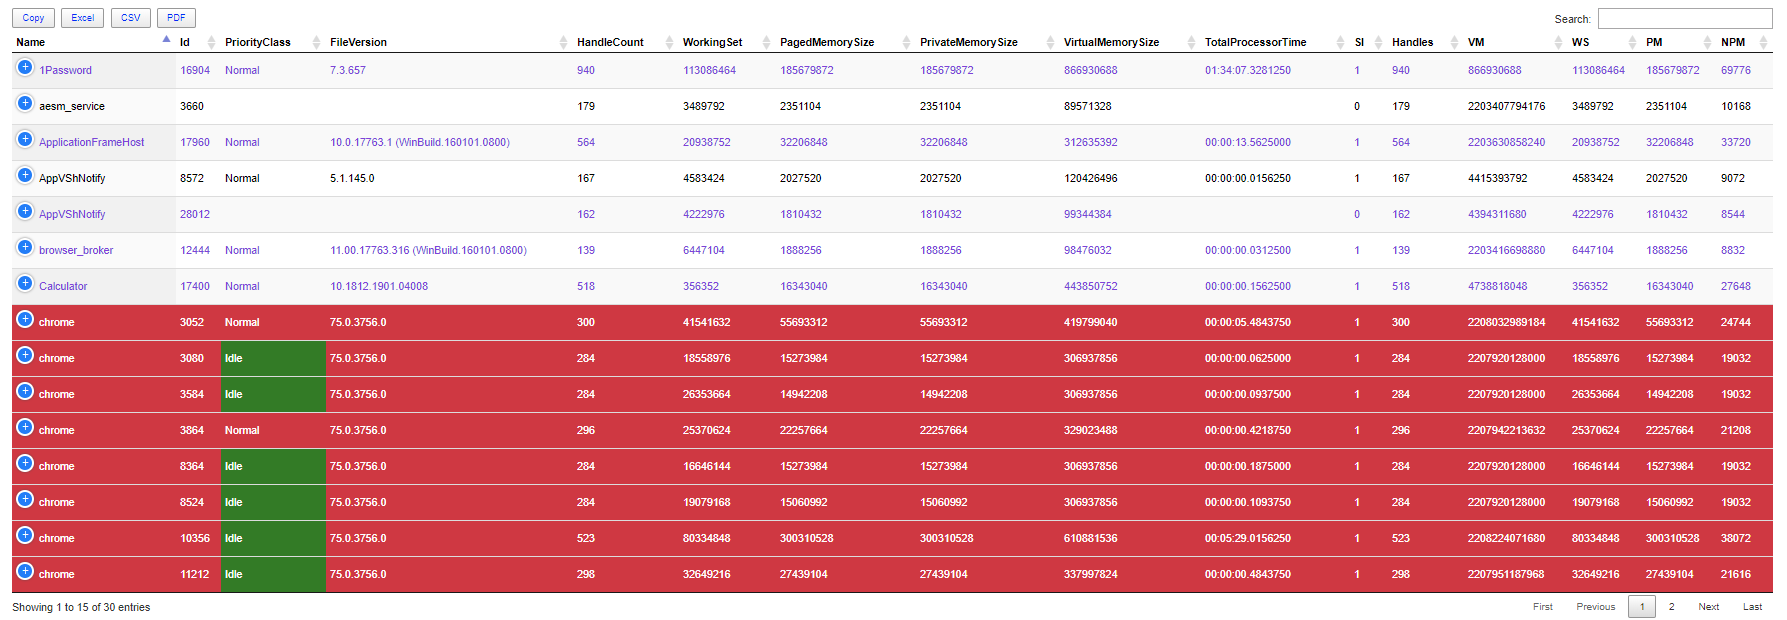
        TableConditionalFormatting -Name 'PriorityClass' -ComparisonType string -Operator eq -Value 'Idle' -Color White -BackgroundColor Green
    }
}
Easy right? I hope so! Keep in mind the coloring part is done from top to bottom. It's entirely possible that the first condition will never show if your second condition will match the same data.
💡 Dashimo – Autorefresh
Dashboard function has Autorefresh parameter. That parameter is really simple in its use. It's a number of seconds to auto refresh the page. While by itself the parameter won't magically load your data it will tell your browser to refresh/reload your HTML after X seconds have passed. Do you wonder how you could use that? Well, you can have PowerShell script running in the background or as Task Scheduler that generates new data every X seconds, minutes, hours and if someone browser keeps that page open it will auto-refresh. If there's no new data, nothing will change, if there is new data, you will get new data.
$Process = Get-Process | Select-Object -First 30

Dashboard -Name 'Dashimo Test' -FilePath $PSScriptRoot\DashboardSimplestTable.html -AutoRefresh 15 -Show {
    Table -DataTable $Process -DefaultSortIndex 4 -ScrollCollapse -HideFooter
}
I don't plan shortly to have live feeding of data from Database, however, it should be possible. I don't want to spend time on it for now, but who knows what future holds.
💡 Dashimo – Table parameters
In this release, I've also exposed multiple parameters to Table. You can play around with them if you want to. Those complicate usage a bit, but it can change heavily what features are enabled or disabled on the table. For example, you can remove export buttons by using an empty Array for Buttons parameter.
$Process = Get-Process | Select-Object -First 30

Dashboard -Name 'Dashimo Test' -FilePath $PSScriptRoot\DashboardSimplestTable.html -AutoRefresh 15 -Show {
    Table -DataTable $Process -DefaultSortIndex 4 -ScrollCollapse -HideFooter -Buttons @()
}
Rest of the parameters you will have to explore for yourself. Keep in mind that some things may not work under certain conditions.
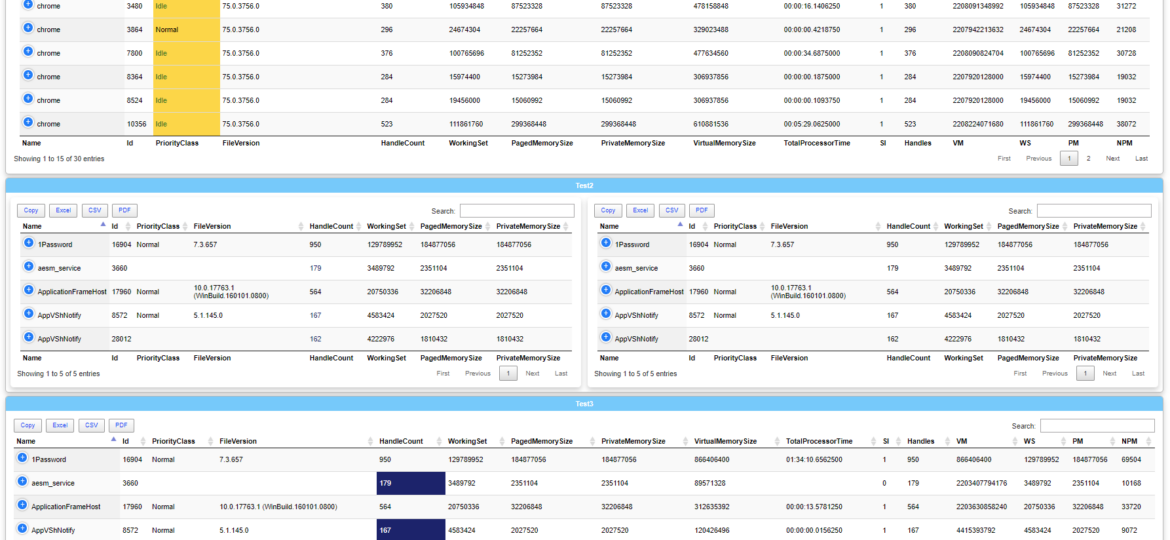
💡 Dashimo – More complicated example 1
$Process = Get-Process | Select-Object -First 30
$Process1 = Get-Process | Select-Object -First 5
$Process2 = Get-Process | Select-Object -First 10
$Process3 = Get-Process | Select-Object -First 10

Dashboard -Name 'Dashimo Test' -FilePath $PSScriptRoot\DashboardEasy.html -Show {
    Tab -Name 'First tab' {
        Section -Name 'Test' {
            Table -DataTable $Process
        }
        Section -Name 'Test2' {
            Panel {
                Table -DataTable $Process1
            }
            Panel {
                Table -DataTable $Process1
            }
        }
        Section -Name 'Test3' {
            Table -DataTable $Process -DefaultSortColumn 'Id'
        }
    }
    Tab -Name 'second tab' {
        Panel {
            Table -DataTable $Process2
        }
        Panel {
            Table -DataTable $Process2
        }
        Panel {
            Table -DataTable $Process3 -DefaultSortIndex 4
        }
    }
}
💡 Dashimo – More complicated example 2
$Process = Get-Process | Select-Object -First 30
$Process1 = Get-Process | Select-Object -First 5
$Process2 = Get-Process | Select-Object -First 10

Dashboard -Name 'Dashimo Test' -FilePath $PSScriptRoot\DashboardEasyConditions.html -Show {
    Tab -Name 'First tab' {
        Section -Name 'Test' {
            Table -DataTable $Process {
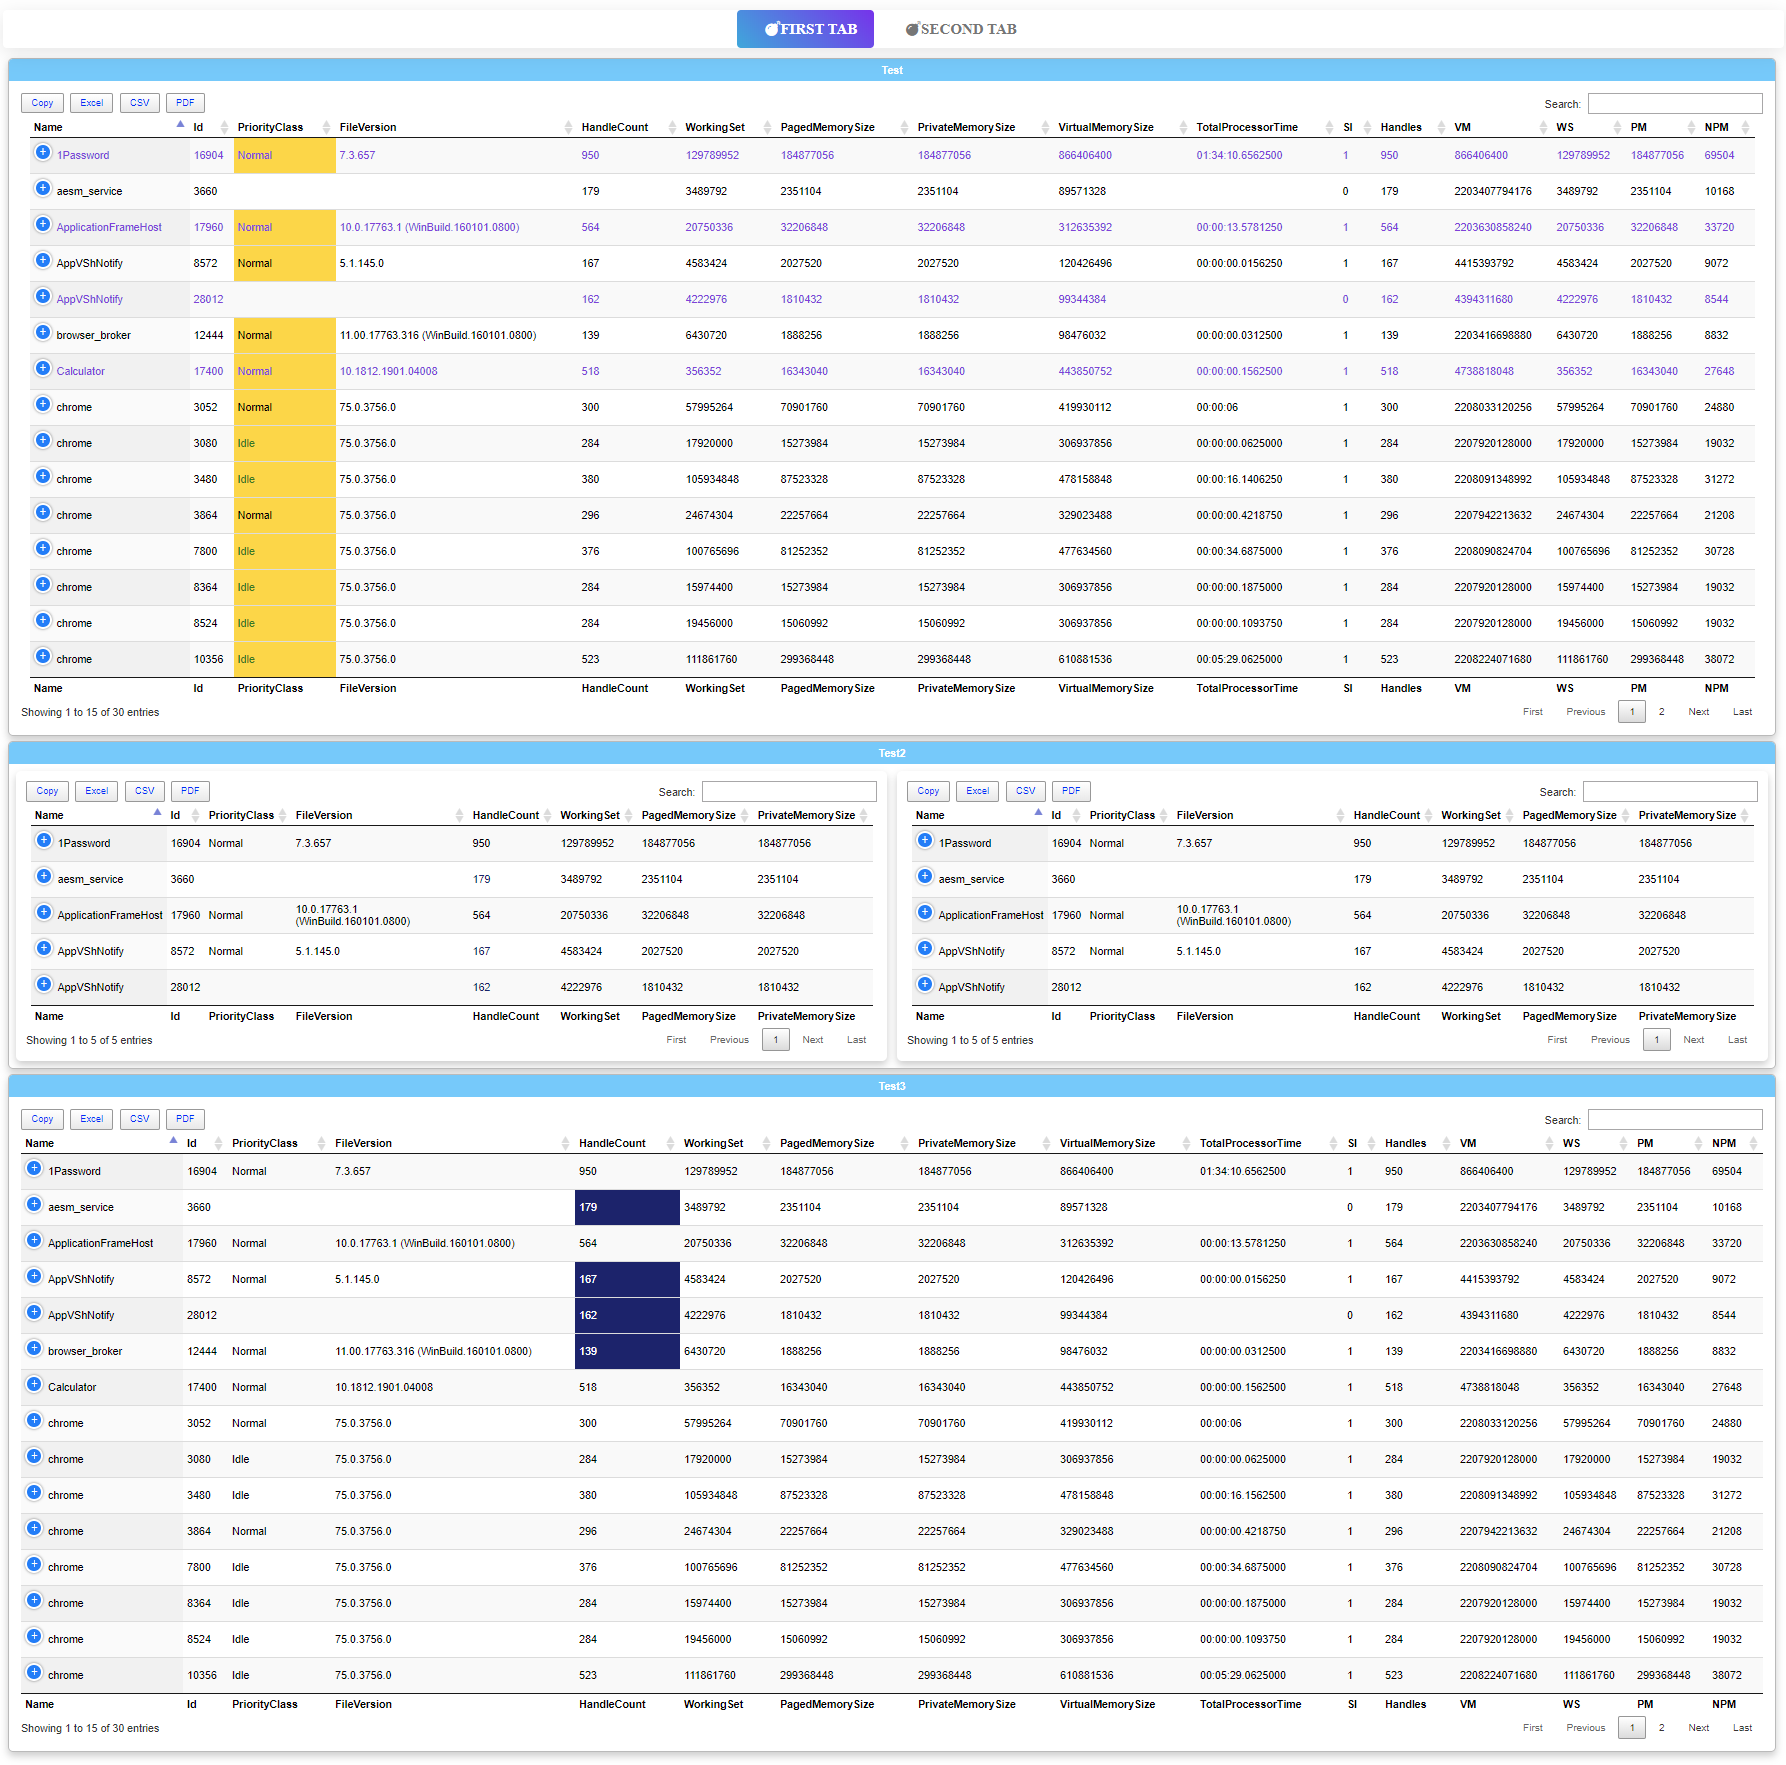
                TableConditionalFormatting -Name 'ID' -ComparisonType number -Operator gt -Value 16000 -Color BlueViolet -Row
                TableConditionalFormatting -Name 'PriorityClass' -ComparisonType string -Operator eq -Value 'Normal' -BackgroundColor Gold
                TableConditionalFormatting -Name 'PriorityClass' -ComparisonType string -Operator eq -Value 'Idle' -BackgroundColor Gold -Color Green
            }
        }
        Section -Name 'Test2' {
            Panel {
                Table -DataTable $Process1 {
                    TableConditionalFormatting -Name 'HandleCount' -ComparisonType number -Operator lt -Value 200 -Color MidnightBlue
                }
            }
            Panel {
                Table -DataTable $Process1
            }
        }
        Section -Name 'Test3' {
            Table -DataTable $Process {
                TableConditionalFormatting -Name 'HandleCount' -ComparisonType number -Operator lt -Value 200 -BackgroundColor MidnightBlue -Color White
            }
        }
    }
    Tab -Name 'second tab' {
        Panel {
            Table -DataTable $Process2
        }
        Panel {
            Table -DataTable $Process2
        }
        Panel {
            Table -DataTable $Process2
        }
    }
}
💡 Dashimo – Final words
Hope you enjoy Dashimo, just like I do. It's supposed to be easy to use and intuitive, and I hope it delivers on that promise. If you have some feature requests feel free to open issues on GitHub. But most of all if you have skills to help expand Dashimo or PSWriteHTML either in PowerShell or HTML, CSS or JavaScript I would be proud to work with You!
💡 Installing / Updating Dashimo
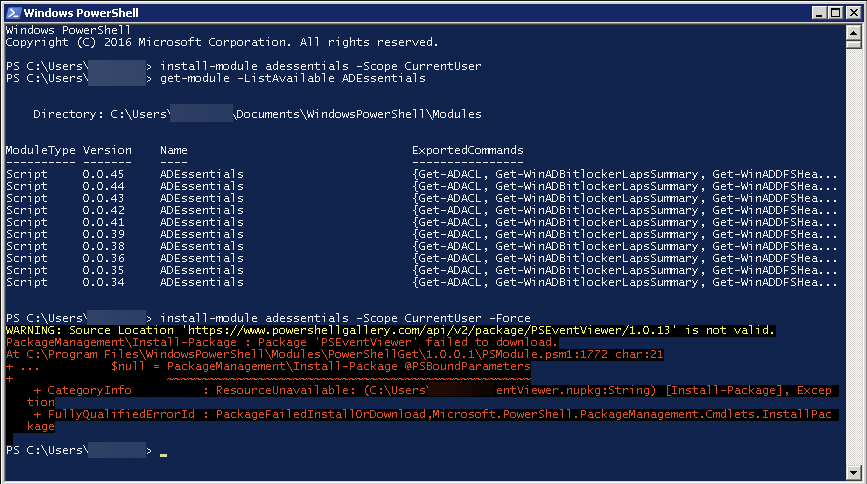
Remember when you want to use new version you need to use the Force switch for the Install-Module. When you don't use the force switch using Update-Module Dashimo only Dashimo gets updated. But Dashimo is based on PSWriteHTML, and that needs updates too. Any required modules per package get updated when you do Install-Module Dashimo -Force
Install-Module Dashimo -Force

